

Cabinet Refinishing Advice
by Ray Horsley • January 10, 2018
Stripping and refinishing kitchen cabinets is an inexpensive but time-consuming task. It is, however, especially practical for limited budgets, on small spans of cabinetry, or when you want to darken the look of cabinets that you are otherwise satisfied with. It's also the perfect way to integrate antique furniture into your current design.
Any flaws in the kitchen cabinets will be magnified by the final finish, so take care of them before you start.
To prepare the kitchen cabinets, gently slide a putty knife under the edge of any loose veneer or parts and squeeze glue into the recess. Use the right tool. Hardware stores sell squeeze bottles with narrow metal spouts made especially for getting glue into tight spots. Clamp the repair, using waxed paper between the clamp and the wood. The waxed paper prevents glue seepage from sticking to the clamp. Leave dings and depressions until you have stripped the surface, then level them with filler that matches the final finish. Preparation is everything. Be diligent.
Tips for Stripping Off the Old Finish on Kitchen Cabinets
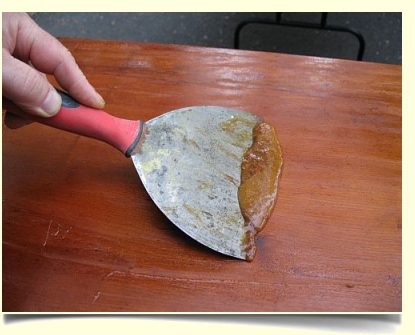
Read the label for specific directions for using the stripper. Protect your floor with a plastic tarp covered with newspaper. Working from the top down, apply the stripper with a brush; don't brush it out of the wood. Round the corners of a 3" putty knife to minimize gouges in the wood. When using steel wool, start with 00, then use 000 and 0000.
Steps for Stripping Paint From Kitchen Cabinets
- Brush on stripper and let it set until the paint begins to bubble along its entire surface. Then scrape off the loosened paint with a paint scraper or wide putty knife, taking care not to gouge the wood. Use a fine-bristled brush or steel wool to remove the paint from recessed surfaces. Reapply stripper and repeat the process as necessary. Remove stripper residue with mineral spirits or the solvent recommended by the manufacturer.
- Start with a medium grit and work up to finer grits, using aluminum oxide paper. Sand slowly to avoid sanding through veneered surfaces. Check the surface frequently with your fingertips to make sure it is uniformly smooth. When the sanding is complete, vacuum the cabinets to remove excess dust and wipe all surfaces with a tack cloth.
- Thin the filler according to the instructions on the label and color it with pigments if necessary. Apply the filler with a piece of burlap (available at crafts stores), using a circular motion and moderate pressure to force the filler into the grain. When the entire surface is covered, wipe it lightly in the direction of the grain. Allow it to dry for 24 hours.
- Use natural bristles for oil or solvent-base stains, synthetic bristles for water-base stains. Apply the stain with a 3-inch brush, loading the brush frequently and applying it to the surface in the direction of the grain. Let the stain set according to the time specified by the manufacturer and wipe up the excess with a soft, clean cloth. Let dry and seal if required for the finish.
Apply varnish with a 3-inch brush, working in long strokes with the grain and with even pressure. When the surface is completely covered, tip it off to level it, using only the tip of the brush held almost perpendicular to the surface. If the varnish bubbles, thin it by 10 percent with the solvent recommended by the manufacturer.
Materials Needed for Stripping and Refinishing Kitchen Cabinets
- Brushes and applicators
- 3-inch putty knife or scrapper
- Steel wool or nylon abrasive pads
- Small fine bristled wire brush
- Sandpaper, various grits
- Finishing or random-orbit sander
- Clean containers for solvents, stains, and finishes
- Filler and burlap
- Rags
- Brushes or applicators for stripper, stain, and finishes
- 3-inch putty knife or scraper
- Steel wool or nylon abrasive pads
- Small fine-bristled wire brushes
overall rating: my rating: log in to rate
