


How to Clean Shaker Cabinets the Easy Way at Home
by Gary Wade • July 29, 2025
Learning how to clean shaker cabinets properly can make them last a lifetime. Most people think maintaining these classic cabinets requires complex methods or expensive products, yet nothing could be further from the truth.
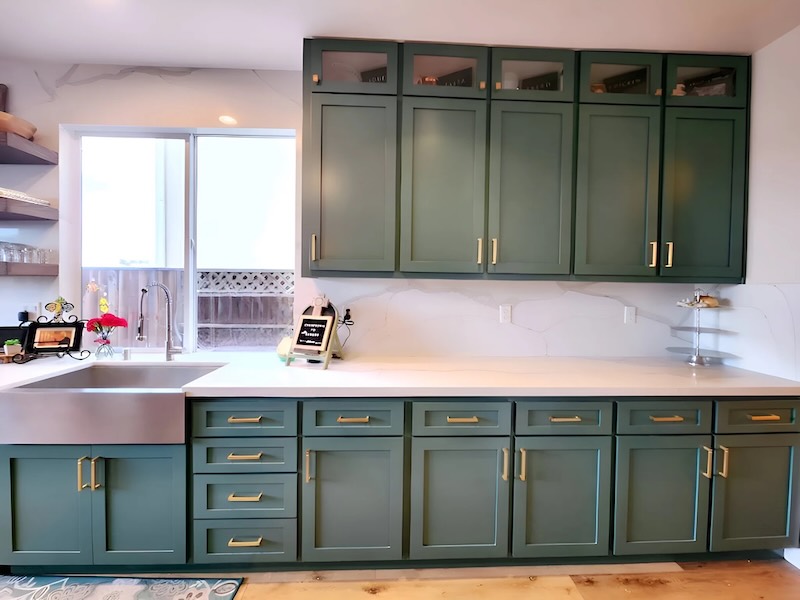
These cabinets have stayed popular over the last several years, and with good reason too - their clean lines, recessed panels, and sturdy build make them a versatile choice for any kitchen theme. Their design features can trap dust, grease, and debris in corners and crevices. Our experience with Shaker kitchen cabinets has shown that water exposure can be damaging over time, and harsh chemicals may cause discoloration or dull the finish.
Our team at Kitchen Cabinet Depot discovered that simple cleaning methods yield the best results. This becomes especially true when tackling specific challenges like cleaning white shaker cabinets without yellowing or reaching those tight cabinet corners where dirt builds up. Regular maintenance usually needs nothing more than a gentle mix of mild dish soap and warm water.
This piece shares practical cleaning techniques that deliver real results. You'll learn to preserve your cabinet's beauty while extending their lifespan. The right approach ensures your cabinets maintain their new look for years ahead.
Basic Cleaning Methods That Work
Your shaker cabinets don't need fancy cleaners to stay spotless. Here at Kitchen Cabinet Depot, we know simple cleaning methods give the best results. Let's look at some proven techniques that protect your beautiful cabinetry.
How to clean shaker style cabinets with soap and water
Mild dish soap and warm water make the quickest way to clean shaker cabinets. This gentle mix cleans dirt without harming the finish or wood. Here's a simple process that works every time:
- Mix a few drops of mild dish soap with warm water in a small container
- Dampen (don't soak) a soft, lint-free cloth or sponge in the solution
- Wipe down cabinet surfaces with gentle circular motions
- Follow with a clean damp cloth to remove soap residue
- Dry with a soft towel right away to prevent moisture damage
A soft toothbrush dipped in your soap solution works great to clean those tricky corners in shaker cabinets, especially where dirt builds up in recessed edges.
Using vinegar-based solutions safely
Vinegar works well but needs careful handling on wood cabinets. Here's a safe vinegar solution:
Mix equal parts distilled white vinegar and warm water in a spray bottle. This 50-50 mix removes fingerprints from cabinet surfaces effectively. You might want to use a more diluted 1:2 ratio (one part vinegar to two parts water) for delicate finishes.
Important note: Never spray directly onto cabinets. Put the solution on your cloth first, then wipe the cabinet surface. Use a dry cloth afterward to remove moisture since excess water can harm wood finishes.
Weekly cleaning checklist for busy kitchens
A simple weekly routine makes shaker cabinet maintenance easy:
- Dust cabinet surfaces with a dry microfiber cloth
- Wipe down cabinet fronts and handles with soap and water solution
- Clean any fingerprints or grease marks, especially around handles
- Focus on cabinets near the stove where grease builds up
- Look for food splatters and clean them quickly to avoid stains
Homes with central air usually need weekly wipe-downs, but kitchens with open windows or lots of cooking might need more frequent cleaning.
Regular cleaning prevents the need for deep scrubbing later. On top of that, it helps to protect your cabinet hinges during cleaning—a dry microfiber cloth works best for metal hardware to stop rust.
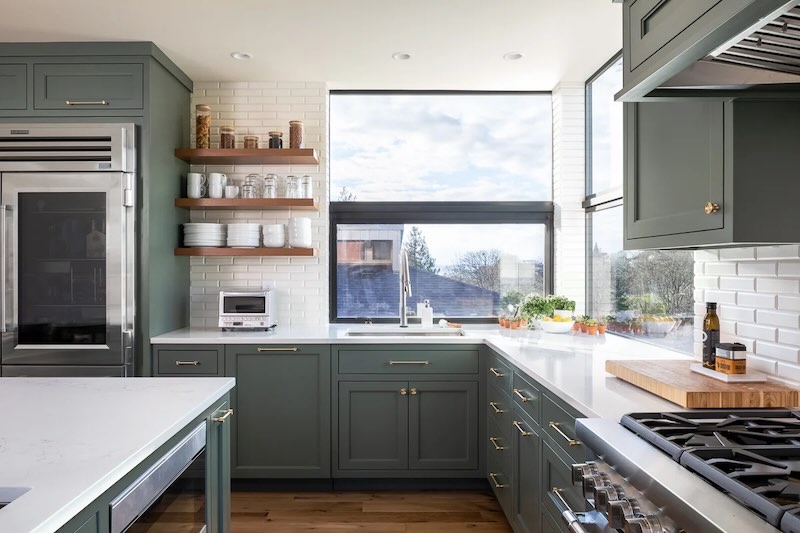
Targeting Common Problem Areas
Shaker cabinets need extra care in certain spots, even with regular maintenance. We at Kitchen Cabinet Depot have found three trouble spots that need special cleaning methods.
How to clean corners of shaker cabinets
Shaker cabinet's recessed panels make perfect hiding spots for dust and grime. You can clean these tricky corners well by following these steps:
- Start by removing loose dust with a dry microfiber cloth or vacuum with a brush attachment
- Dip a soft-bristled toothbrush into your mild cleaning solution
- Gently scrub along the edges and corners where dirt builds up
- Wipe away loosened debris with a damp cloth
- Dry well with a clean, dry cloth
A blast of compressed air can help remove stuck debris from crevices before wiping. This works great to get rid of dust that regular wiping can't reach.
Removing grease from cabinets near the stove
Cabinets next to or above cooking areas will collect greasy residue. These stains are usually bigger and harder to clean than normal dirt.
A mix of equal parts vinegar and water works well for light grease. You can tackle tough grease stains this way:
- Mix baking soda and water into a paste
- Apply to greasy areas and wait 15-20 minutes
- Gently scrub with a soft cloth
- Rinse with a damp cloth and dry well
Warm water with a few drops of grease-cutting dish soap can also work great for kitchen cabinet grease.
Cleaning fingerprints from high-touch areas
Cabinet doors and hardware collect oily marks from fingers, mostly around handles. These spots need frequent cleaning.
You can clean daily fingerprints on shaker cabinets with a cloth dampened in equal parts water and vinegar. Just wipe and buff with a polishing cloth. This method keeps your cabinet's finish safe.
Stubborn fingerprints on white shaker cabinets usually come off easily with a microfiber cloth and a tiny drop of dish soap. Just be gentle, too much scrubbing with a wet microfiber cloth can dull or wear away the paint over time. Rinse with a clean, lightly damp cloth and dry right away to prevent water damage.
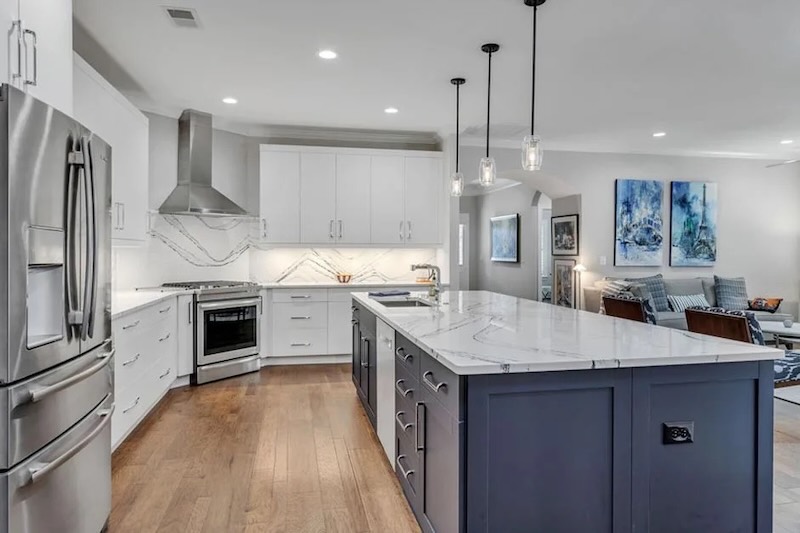
Special Care for White Shaker Cabinets
White shaker cabinets look crisp and clean, but they need special care to maintain their bright appearance. Our team at Kitchen Cabinet Depot has discovered specific techniques that help preserve these cabinets' pristine condition.
How to clean white shaker cabinets without yellowing
Many white shaker cabinets on the market may develop a yellowish tinge over time, especially with prolonged sunlight exposure. However, our white shaker cabinets are finished with a catalyzed conversion varnish that includes a hardener and UV protection, helping resist yellowing and maintain their crisp appearance longer. That said, we still recommend using window treatments like blinds or curtains to minimize harsh UV exposure and protect all finishes over time.
Here's an effective solution if your cabinets show signs of yellowing:
- Wipe down cabinet surfaces with soapy water
- Apply a paste of baking soda and water to visible yellow areas
- Let sit for several minutes, then gently scrub
- Rinse with a solution of equal parts white vinegar and water
- Dry really well with a soft cloth
Yellow stains won't take hold if you maintain your cabinets regularly. A monthly deep cleaning routine combined with spot-cleaning should keep them looking fresh.
Avoiding harsh chemicals that damage paint
White painted cabinets can easily get damaged by inappropriate cleaning products. Yes, it is true that wrong chemicals strip finishes and speed up yellowing.
Never use these on white shaker cabinets:
- Bleach or ammonia-based cleaners
- Mineral spirits or paint thinners
- Abrasive scrubbing pads or brushes
- Strong solvent cleaners
Gentle alternatives work best - dish soap with warm water, specialty wood cleaners, or a mild vinegar solution will do the job. Remember to test any new cleaning product on a hidden spot first.
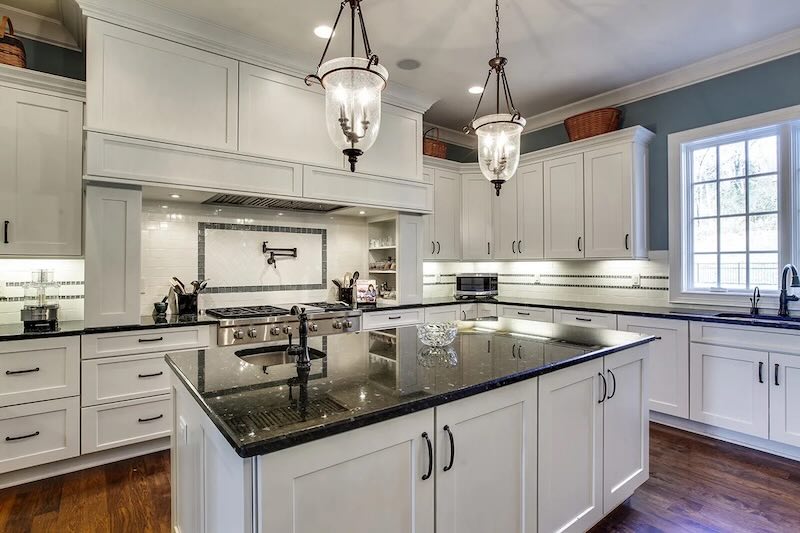
Tips for keeping white cabinets looking bright
Your white shaker cabinets' brightness needs constant attention. A daily wipe with a dry microfiber cloth prevents dust buildup that can act like sandpaper and wear away the paint.
Microscopic grease particles from cooking stick to cabinet surfaces and cause discoloration. Your range hood can drastically reduce this issue while cooking. Food splashes need immediate attention - don't let them dry and set.
Keep your cleaning cloth slightly damp - soaking cabinets causes problems. Excess moisture seeps into cracks, makes wood swell and paint peel. Spray your cleaning solutions on the cloth instead of the cabinet surfaces and finish with a dry cloth.
Extra Tips for Long-Term Maintenance
Good maintenance habits will help your shaker cabinets last for decades beyond regular cleaning. Our team at Kitchen Cabinet Depot has found that preventative care extends cabinet life by a lot and keeps their original beauty intact.
The right time to reapply finish or polish
Your shaker cabinets' surface finish plays a vital role in their long-term durability. Industry standards suggest refinishing cabinets about every 10 years or whenever you need minor repairs. Cabinets with painted finishes need repainting every 3-5 years, even though complete refinishing can wait longer.
Wooden shaker cabinets need polish every few months to maintain their shine and protect the finish. Here's how to keep the wood's natural beauty:
- Clean the surface really well using your usual cleaning method
- Apply a quality wood polish (we recommend Aristo Shield Protective Polish)
- Buff gently with a soft cloth in the direction of the wood grain
Your cabinets might need refinishing if you notice fading color, bubbling finish, or peeling surfaces. Quick action prevents more damage.
Taking care of minor scratches and dents
You don't need complete refinishing for small imperfections. Here's what to do with light surface scratches on shaker style cabinets that show minor damage:
Start by cleaning the scratched area with a soft cloth and mild cleaner. Light scratches often disappear if you rub a walnut or pecan into them - natural oils hide the damage and blend with the wood around it.
You could also use a wax crayon or wood marker that matches your cabinet color to fill the scratch. A quick buff with a soft cloth helps the repair blend naturally.
Wood filler works great for obvious damage. Put a small amount on affected spots, smooth it with a putty knife, and sand lightly after it dries. Add matching paint or stain if needed.
Looking after loose hardware
Wobbly knobs and hinges can get annoying and might damage cabinet doors over time. Check your hardware monthly:
Fix loose knobs by holding them still while turning the screw clockwise with a Phillips screwdriver. The screw might be too long for your cabinet door if the knob still wobbles after tightening. A small washer between the screw head and door can fix this issue.
Stubborn hardware might need a tiny bit of thread locker before you tighten it again. Just be careful not to overtighten, especially with glass or delicate knobs that could break under too much pressure.
Cleaning Shaker Cabinets
Beautiful shaker cabinets don't need complex care or costly products. Simple and gentle cleaning methods work best for daily maintenance. The classic appeal of shaker cabinetry needs proper care to keep its timeless elegance.
Cleaning with mild soap solutions stops most problems before they start. On top of that, it helps to focus on trouble spots like corners and frequently touched areas to keep cabinets looking their best. White shaker cabinets need extra care to avoid yellowing, but they reward you with a crisp, clean look that makes any kitchen brighter.
A kitchen renovation with shaker cabinets is an investment that lasts. Kitchen Cabinet Depot's premium shaker cabinets blend classic style with modern durability. Your careful upkeep will protect this investment for decades.
Prevention works better than fixing problems later. Cleaning spills right away, using gentle products, and doing regular checks will make your cabinets last longer. Quick polishing every three months and checking hardware can catch small issues early.
The charm of shaker cabinets comes from their simple design and easy care. These practical tips will help your cabinets keep their elegant look while serving as functional storage. In the end, well-kept shaker cabinets are more than just kitchen furniture - they're the centerpiece of a home that values tradition and quality.
FAQs
1. How often should I clean my shaker cabinets?
For most kitchens, a weekly wipe-down with a damp cloth is sufficient. However, cabinets near cooking areas may require more frequent cleaning. Establish a routine based on your kitchen's usage and ventilation.
2. What's the best way to clean shaker cabinets without damaging the finish?
Use a mixture of mild dish soap and warm water. Dampen a soft, lint-free cloth with this solution, wipe the cabinets gently, then follow up with a clean damp cloth to remove soap residue. Always dry immediately to prevent moisture damage.
3. How can I remove grease buildup from my shaker cabinets?
For tough grease stains, create a paste using baking soda and water. Apply it to the greasy areas, let it sit for 15-20 minutes, then gently scrub with a soft cloth. Rinse with a damp cloth and dry thoroughly.
4. What's the best way to clean the corners and grooves of shaker cabinets?
Use a soft-bristled toothbrush dipped in a mild cleaning solution to gently scrub along the edges and corners where dirt accumulates. Follow up by wiping away loosened debris with a damp cloth and drying thoroughly.
5. How can I prevent white shaker cabinets from yellowing?
Protect cabinets from direct sunlight, use gentle cleaning methods, and avoid harsh chemicals. For regular cleaning, use a mixture of mild dish soap and warm water. Address spills and splatters immediately, and consider applying a quality wood polish every few months to maintain the finish.
overall rating: my rating: log in to rate
