

How to Paint Kitchen Cabinets
by Ray Horsley • July 11, 2018
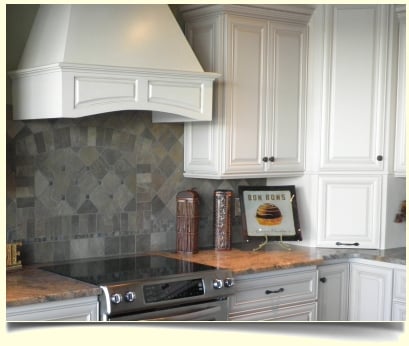
Painting your kitchen cabinets is the quickest and least expensive way to give them a facelift. Painting is a wonderful choice for unfinished kitchen cabinets. Unfinished kitchen cabinets may be stained, painted or a number of other creative mediums. Old cabinets may also be used as a blank canvas for those wishing to do folk painting art.
All cabinets, especially those in kitchens, baths, and children's playrooms need a hard surface that will stand up to wear and repeated cleanings. The hardest paint surface for home use, modified alkyd paint, comes in aerosol spray cans. Spray painting, even with aerosol cans, is an art. Sprayed improperly, the paint will sag and run. If you use this method, protect surfaces you don't want to be painted by masking them off well beyond the painted areas.
Alkyd or oil-based paints are tough, durable, high-gloss paints. They dry quickly, some within 48 hours, which is an advantage if you have to be done in a short period of time. These paints have a strong oil smell and require thinner for cleanup. An oil-based primer is required when painting over a urethane finish. Latex paints won't stick to urethane.
Acrylic water-based paints are the easiest to apply and produce an acceptable gloss and hardness. They take longer to cure, however; some as long as a week. Cleanup with water is easier than with oil paints.
Steps before you begin painting
Empty the cabinets and the drawers, then pull the drawers off their slides and take off the doors at their hinges. Remove all hinges, pulls, knobs, and closers, and store them if you plan to reuse them.
Wash all cabinet surfaces, doors, and drawer fronts with a mild solution of trisodium phosphate (TSP). When dry, remove loose or peeling paint with a scraper and sand the surfaces lightly with 120-150-grit sandpaper. Wipe off with a tack rag.
Paint cabinet interiors first, starting at the top of the cabinets and working down. Use a brush for narrow surfaces and to cut in at the edges. Then use a wide brush or short-nap roller. Follow the same procedure on the exterior.
Cover a horizontal work surface with plastic tarps or newspaper. Support the doors with 2x scrap so you can paint the edges without dragging the brush on the work surface. When one side is dry, paint the other.
Stand drawers on their back end and paint the drawer fronts. Leave the drawer box unpainted. Let the paint dry thoroughly before reinstalling the hardware.
Cover a horizontal work surface with plastic tarps or newspaper. Support the doors with 2x scrap so you can paint the edges without dragging the brush on the work surface. When one side is dry, paint the other.
Preparation is the key to a smooth paint job. Begin preparation by washing and sanding the surfaces. Washing removes grease and grime that makes sanding or de-glossing impossible. Sanding gives the old finish a slightly roughened surface that improves the adhesion of the new paint. Sand with the grain until the shine on the surface becomes dull. Don't sand so deeply you go through to bare wood. Scrape off the loose finish.
Before painting, fill depressions and spots left bare from scraping with latex filler, then sand smooth. Fill and sand hardware holes if you are changing pulls or hinges.
Tips for painting kitchen cabinets
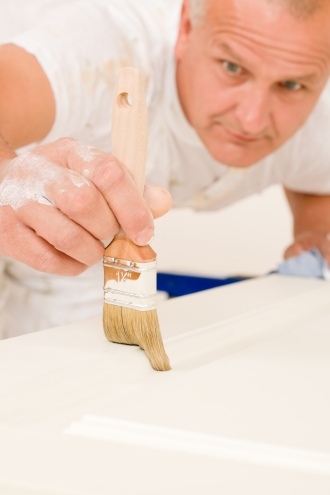
Before you start painting, dip the brush up to its ferrule in water (for latex paints) or paint thinner (for oil-based paints) and tap out the excess liquid. This will keep the paint from drying up at the ferrule and stiffening. Then, after dipping the brush in about an inch of paint, cut the paint in at the edges of the surface, working from unpainted to painted areas.
Paint wide surfaces with a short-nap (1/4-inch) roller. The roller will leave a slight pattern, which you must lay off (brush out) with a brush. While the surface is wet, pull the tip of the brush through the paint in long overlapping strokes.
Finish up by working the brush with the grain from one end of the surface to the other. The interior of the cabinets is a great place to practice this procedure. Don't worry about the small brush marks left in the paint. They will level themselves out as the paint dries. When the first coat has dried, apply the second coat using the same techniques.
Use natural-bristle brushes with oil paints, synthetic bristles for latex paints.
To keep a brush fresh during breaks, suspend it in solvent (water for latex paint). Keep rollers pliable in airtight bags.
When cleaning a brush, shake it back and forth in a one-gallon container of water or paint thinner. Spin it out with a spinner and repeat the process with fresh thinner. Dispose of thinning liquids in the proper manner.
Sand recesses with a flexible sanding block or bend sandpaper around a large dowel.
A complete paint job usually requires a coat of primer and two coats of the finish paint. Check the paint manufacturer's specifications to see whether a primer is required (it is needed over a urethane finish). If priming unfinished kitchen cabinets with a latex primer, sand the dried primer lightly with 220-grit sandpaper. And whatever paint you use, buy the highest quality you can afford.
What You Will Need
- Phillips and flathead screwdrivers or cordless drill
- Wide and" narrow putty knives
- Random-orbit sander, coarse and fine grits
- Masking tape
- 2 1/2-inch brush
- Paint tray and liners
- Roller handle and two or three lamb's wool sleeves
- Primer and paint
- Thinner for oil-base paints
- Tack cloth
overall rating: my rating: log in to rate
