

How Can I Replace Old Kitchen Cabinet Doors and Drawer Fronts?
by Ray Horsley • May 15, 2018
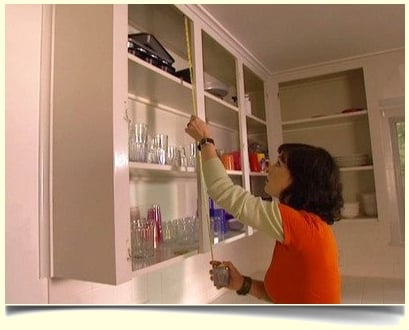
Want to know another very "green" thing to do when kitchen remodeling? Here's how to replace your old kitchen cabinet doors and drawer fronts. If your old cabinet boxes are sturdy and still have a decent finish, you can replace the old doors and drawer fronts with new ones that either match or contrast the old boxes. Measure and order new doors from a reputable company.
The most critical aspect of replacing cabinet doors and drawer fronts is making them look right by centering them on their openings and keeping them square. Masking tape makes this task precise, but apply the tape lightly and pull it off gently to avoid pulling off the cabinet finish. If using a cordless drill to drive hinge screws, set its clutch to keep from overdriving the screws.
Installing New Doors On Old Cabinets
Apply 2-inch masking tape lightly along the entire run of the cabinets. Run the tape on the bottom of wall kitchen cabinets and the top of base cabinets. Using the reveals you noted on your layout sketch, mark the door positions on the masking tape. Snap a chalk line along the entire run so all the doors will fall on the same line. Then mark the tape where you want the edges of the doors to fall.
Install hinges on kitchen cabinet doors next.
Hold the door on the marks and install one screw only in the top hinge plate. Leave the screw slightly loose and use it as a pivot to align the bottom of the door. Install the lower hinge with one screw, leaving it loose. Install the remaining doors in the same fashion.
Line up each door precisely and tighten the loose screws. Pre-drill and install the remaining screws on all doors. Remove the masking tape.
Installing Drawer Fronts on Kitchen Cabinets
Apply tape in the same way as for doors, and mark the tape for the exact placement of the drawer front.
Pre-drill the drawer box for the attachment screws. Make the holes a little smaller than the screws. Insert the screws from the back of the drawer box and tighten them until just the point pokes through the front.
Insert the drawer box in the opening.
Holding the drawer front on the lines marked on the masking tape, reach behind the drawer, and push it forward until the points indent the rear surface of the drawer front.
Remove the drawer and install the font, using the indented holes to position the screws. Do not over tighten the screws. Remove the masking tape gently.
Some notes: To replace the fronts on drawers with separate face panels, unscrew the fasteners that hold the front panel to the drawer box. Align the new panel with the drawer box and fasten it.
On drawers that have front panels integral to the drawer box, clamp the front panel and remove the edges with a handsaw. Align the box on the new panel and fasten it with screws of the proper length.
Installing Hidden Hinges onto Kitchen Cabinet Doors
Drill 35 mm holes for the hinges. If necessary, spacing them 3 1/2 inches to the center from the top and bottom of the doors. Lay the door on a flat surface and set the hinge in the hole with the mounting plate attached. Align the perpendicular to the edge of the door and screw it into place.
Hold the door in place, centered on the opening, and mark the location of the mounting plates on the inside of the kitchen cabinet frame. Disassemble the mounting plates from the hinges and mark the location of the screws. Pre-drill the holes and fasten the mounting to the frame.
Insert both hinges in the mounting plates and tighten the adjustment screws slightly. Open and close the door and adjust its position, tightening the adjustment screws after the door is centered in its opening.
overall rating: my rating: log in to rate
